A failure is still a success, because you've learned from it and grown from it. How can we create an environment where we talk about failures? First full day of ISTE, I spend the morning going to poster sessions and playgrounds. Then I go to my first session. I thought I would go to ISTE and learn ALL the educational technology things (cue the all the things meme guy). I thought people would only share their successes, because that's often what we hear at conferences and see on social media. Wrong. So delightfully wrong I was. And I started seeing that at my first session titled "#EpicFailures by Women Leaders in Educational Technology #oktoplayoktofail." The panel consisted of Kelly Sain, Heather Lister, Sarah Thomas, Rusul Alrubail, Kim LeClaire, and Diane W. Doersch. In addition to the two quotes above that were taken from this panel, Heather Lister also said this during the discussion, "If we normalize sharing our failures, if others see people they idolize sharing failures, we'll realize there's no such thing as a perfect leader, but until we see that, we hold ourselves to it. It's doing everyone a favor to talk about failures."
These brave, failure warriors gathered a large group of strangers in a room, shared their own failures, had us share out our career epic failures at our tables, and managed to make me feel empowered when I left the session. Talking about failure is vulnerable and scary, but once it's out there, and you see others sharing theirs, there truly is something freeing and empowering about that. Ironically I then proceeded to try to show up to my BYOD session an hour early, and then stumbled upon Carl Hooker having a Fail Fest in ISTE Central. One thing he mentioned was the barriers to creativity. He listed anxiety about being wrong, discomfort with unknown, fear of
0 Comments
Do you have several little makerspace devices that need to be charged but also stowed securely? Me too! I was so excited to have funds to order 10 phones to use for VR and a set of Ozobots this year (which I still need to play with and learn how to use the Ozobots), but then I needed to think about where, when, and how to charge them. For this year, I plugged two power strips in on the Makerspace counter and kept the phone chargers plugged into that and charged the phones when I could keep an eye on them, but clearly that wasn't ideal. And then my Ozobots came in towards the end of the school year, and I thought I might just have to have the Ozobots and phones take turns charging when someone could keep an eye on them. Hmmm...what to do? Our building tech, who I often work with and our roles sometimes overlap, mentioned to me this spring that some buildings were getting rid of tech carts they no longer needed. They had been used for laptop carts, iPad classroom carts, etc. before our district was fully one to one. He asked me (and other folks in the building too) if there was a need for any. At first, I wasn't interested and thought it'd be one more thing to take up space, BUT then he mentioned several of them have locks AND outlets with power. And my interest went from low to through the roof! YES! Pick me! I'll take two! I immediately envisioned one being for the phones and VR and one for the Ozobots! I started putting them together and thinking this out a little bit on my last work day before summer break as you can see in the pictures below, but there's still some work to go for sure. The smaller one, I started fashioning to be our VR cart. As you can see in the third picture over, I put 33 cardboard headsets in it (11 per shelf) on 3 of the left shelves and plugged in the 10 phone chargers on the right side. Yes, I did write their on them in Sharpie in two spots on each of the VRs. They're cardboard! In July or August, I will plug the phones into those chargers, and I plan to put our portable AUP we use for Google Expeditions on the remaining open shelf to the bottom left. Before students start, I plan to put some labels in the cart about what pieces should go where in the hopes of keeping it organized. I will also type up some instructions or tips for teachers and put them somewhere in or on the cart.
The larger cart, I'm planning on using for our Ozobots. But I think I could easily fit the Ozobots in half of the cart space if that even with chargers, markers, etc. for a set of around 15. I'm not sure yet what I'll do with the remaining space. I might just leave it open until something else that needs a lot of chargers comes along. We'll see. I didn't have time to start that cart much due to other priorities that day, and I need to play around with the Ozobots more too and learn how to use them. I will hopefully do that towards the end of summer break. I try to make as many things in the Makerspace as I can able to be checked out. This will help make those items more mobile, while allowing for them to be charged and secured when not in use. I'm excited I had a chance to start this before summer began and am excited to see where this could take us next school year! I'll write a post with updates after they're done. There are so many ideas and things I tried this semester that I am itching to share. You'll hear about more of them over the summer in addition to topics I present about at or learn from Innovation Exchange or learn about at ISTE and nErD Camp Indy. I will also participate in EdChange Global for my third year and EdCamp Voice again. Both of which are free, entirely online, and a great way to connect. (I'll have to write a more extensive blog post about them.) But one thing I need to share right away is about how I started meeting with departments in the Makerspace like I mentioned in my posts "It's starting!" and "Do what you can, when you can." Back in the winter, I was at a meeting with other district librarians, and a small group of junior high librarians were brainstorming and sharing ideas about how to bring teachers and classes into a makerspace. One of the librarians mentioned using PLC (professional learning community) time to meet with departments about the makerspace. Eureka! This is the opening I was looking for! Our district implemented a new PLC structure this year. We have an early release on Monday's and then are to meet with our departments during that time to work intentionally on goals set as a group, data analysis, assessment creation, etc. I could use time departments already had to meet instead of adding an extra meeting and thing to do to their plate to get them into the Makerspace. Genius! Within a few days, I fleshed out my ideas for how to do this in my building and ran it past my principal. After getting the green light, I presented the idea at the upcoming department head meeting. Multiple departments scheduled times with me to meet in the Makerspace during PLC's second semester. I was so excited to have an opportunity to show departments how the Makerspace could be tied into their curriculum, so I wanted to have some of my preparation tailored to each group. the meeting's preparation Oh my gosh, folks! I just needed to share that I feel like it is finally starting to happen! A few years ago I had a distant interest in starting a makerspace. A little over a year ago that started to become a reality as I had funds and could began brainstorming, pricing, and ordering. About six months ago I began the process of organizing, barcoding, labeling, and beginning implementation steps. Then I started sending out information to teachers; then classes came through to try out items; then I started leading meetings with different departments and grade levels to show them what the items are and help generate curriculum specific ideas; and then I created a shared folder of all the documents I had emailed, shared at meetings, etc.
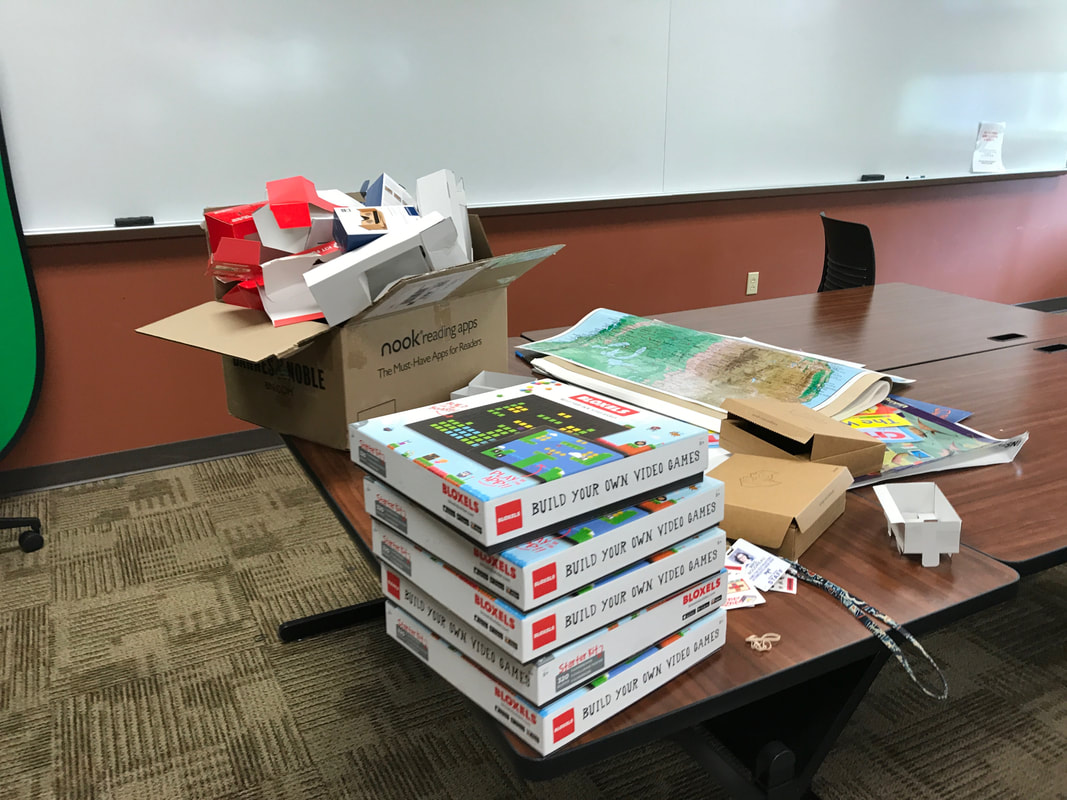
And this week, it happened! This week a 7th grade science teacher used one of my ideas and checked out 4 of my 5 sets of Bloxels as a project option for students to replicate the water cycle Another science teacher asked to chat about using Google Expeditions on fossils. A 6th grade Humanities teacher checked out several of our What and Why
I wanted to start having open Makerspace times for students to come and use the space outside of class time or instruction. I want them to just be able to explore and do what they're interested in or need in the space. I am in there and available to help or advise as needed, but I'm trying to be pretty hands off and let them guide themselves. Down the road I'd love to have some guided activities too during these times as some kids may prefer that or it might show them ideas of things to do, but that might be something to tackle next school year. When This was tricky for me. My school has a fixed library schedule, and I have a lot of meetings this year. We also have 4 different grade levels with 3 different schedules. Monday mornings and Friday afternoons are two of my most consistent open times (probably because people don't like having meetings then). So I am starting out with Monday's during morning homeroom time for our 5th graders and Friday's during SLT for my 6th-8th graders (guided study hall). So ideally each grade level has at least once chance a week to sign up. My 6th graders that are in band, orchestra, or choir are the tricky ones, because they're never free during SLT, so I don't currently have a solution for them unfortunately. My setup mistakes My school talks a lot about grit, learning pits, and growth mindset. I definitely started out in the pit and revisited it a few times while I was working on setting up our two 3D printers! I didn't know anything about setting up a 3D printer and had never used one before when I sat down to do it about two weeks ago. If I can set one up, you certainly can too, but maybe you can avoid a few of the rookie mistakes I made.
The printer I ordered (New Matter's MOD-t) came with a few setup instructions and directions on where to go for full instructions and pictures on their website. The website's instructions were thorough and very user friendly. They made setup easy! I got one of the printers up and running on the counter using my laptop quickly and was amazed at how easy it was...but then I realized I had made two mistakes that would need fixed: Mistake #1 was setting up the first of two printers through my teacher laptop instead of through the computer it'd be hooked up to on a regular basis. I thought we'd be able to house the printers on the counter and print wirelessly. Nope! The printers do have that capability, but my space just can't support that the way I wanted, and the computers I'll need to use for printing are all hardwired to the internet. So I then quickly enlisted the help of our building technology specialist, who helped me remove two of the computers to put a 3D printer on each end of that front row of two of computers. We had to undo the wiring of those, and then I setup the wiring of the printers to connect them to those computers. The one thing I didn't take into account when I ordered makerspace items was unboxing! Some of the items took a fair amount of time and a few plastic/paper cuts to get unboxed, and I definitely made a bigger mess before I made a smaller one! About two weeks ago now I worked on barcoding and organizing the makerspace items we have so far. I basically barcoded EVERYTHING so that we can keep track of what we have, who is using it, and be able to check our inventory as the space will continue to grow. My district uses Follett's Destiny, but I'm sure you could barcode and enter your makerspace items in any library system. I always keep several extra barcodes on hand that I printed out on Avery labels myself using Destiny. I didn't barcode the 3D printers at this time, because I don't see them ever leaving the counter they're currently on, but I'm considering barcoding them later for inventory purposes. I mulled over what our makerspace rules should be for a while. I didn't want to have a lot of rules. I didn't want to have a lot of do not's or no's. But as any educator knows, you need some rules or expectations to have things work. From all of the blog posts I've read and conversations I've had, it sounded like clean up was one of the most important rules to establish early on. Someone (Can't remember who, I'm sorry!) mentioned needing to keep students from undoing or damaging the work of others, which gave me my second rule. Then I wanted to make sure students weren't being wasteful and were using resources well, thus 3 and 4 were born. And then I believe that rules 5 and 6 about collaboration and attitude are something all makerspaces should be trying to encourage. As long as you have the right intentions and priorities that work for you and your students, there isn't a wrong starting list. Everyone starts with different items. As long as you have the right intentions and priorities that work for you and your students, there isn't a wrong starting list. With the grant money I mentioned when I talked about budgeting and planning here, it was important to me to get a balance of tech and non tech items, but I also didn't have a lot of money and needed to be extra frugal. With my starting items, I also wanted to get things students could explore more independently and in the library. This was before I knew I'd be able to turn a computer lab into a designated makerspace, which I'll be undertaking this school year.
The starting list from the grant money:
I've had a dream of starting a school library makerspace ever since I made the switch from classroom English teacher to school librarian two years ago. I had already heard of them and read about them and thought they sounded AMAZING. Creativity, technology, problem solving, collaboration, critical thinking, and trying new things! What's not to love? So last summer when I attended a summer PD in my district that had a session on grants, I jumped at the chance to learn about grants. I then applied for and got a small grant from my district's education foundation. Fast forward to this past winter, and we had some funds to spend on technology. Some of those funds got allotted for collaboration stations and some for a makerspace. I ordered the items in the spring for us to use this coming school year. In both of these cases I worked to make sure I got the most bang for my buck. When you have a chance to use funding for a makerspace, you want to put money in things that will benefit students and have impact, but you also want to do that as cost effectively as possible to get more. So how do you get the most bang for the buck with provided funds or prepare a grant proposal budget?1. Brainstorm. After scouring blog posts like this one
|

 RSS Feed
